Preface
I’ve been playing ollama locally for a long time, today I’m going to install ollama on the server, but the server doesn’t have an extranet, so I can only install it offline, I’ve looked for offline tutorials but there are fewer of them, so I’m going to write my own, so that I can check it out in the future.
Install Ollama Offline
Download the Installer
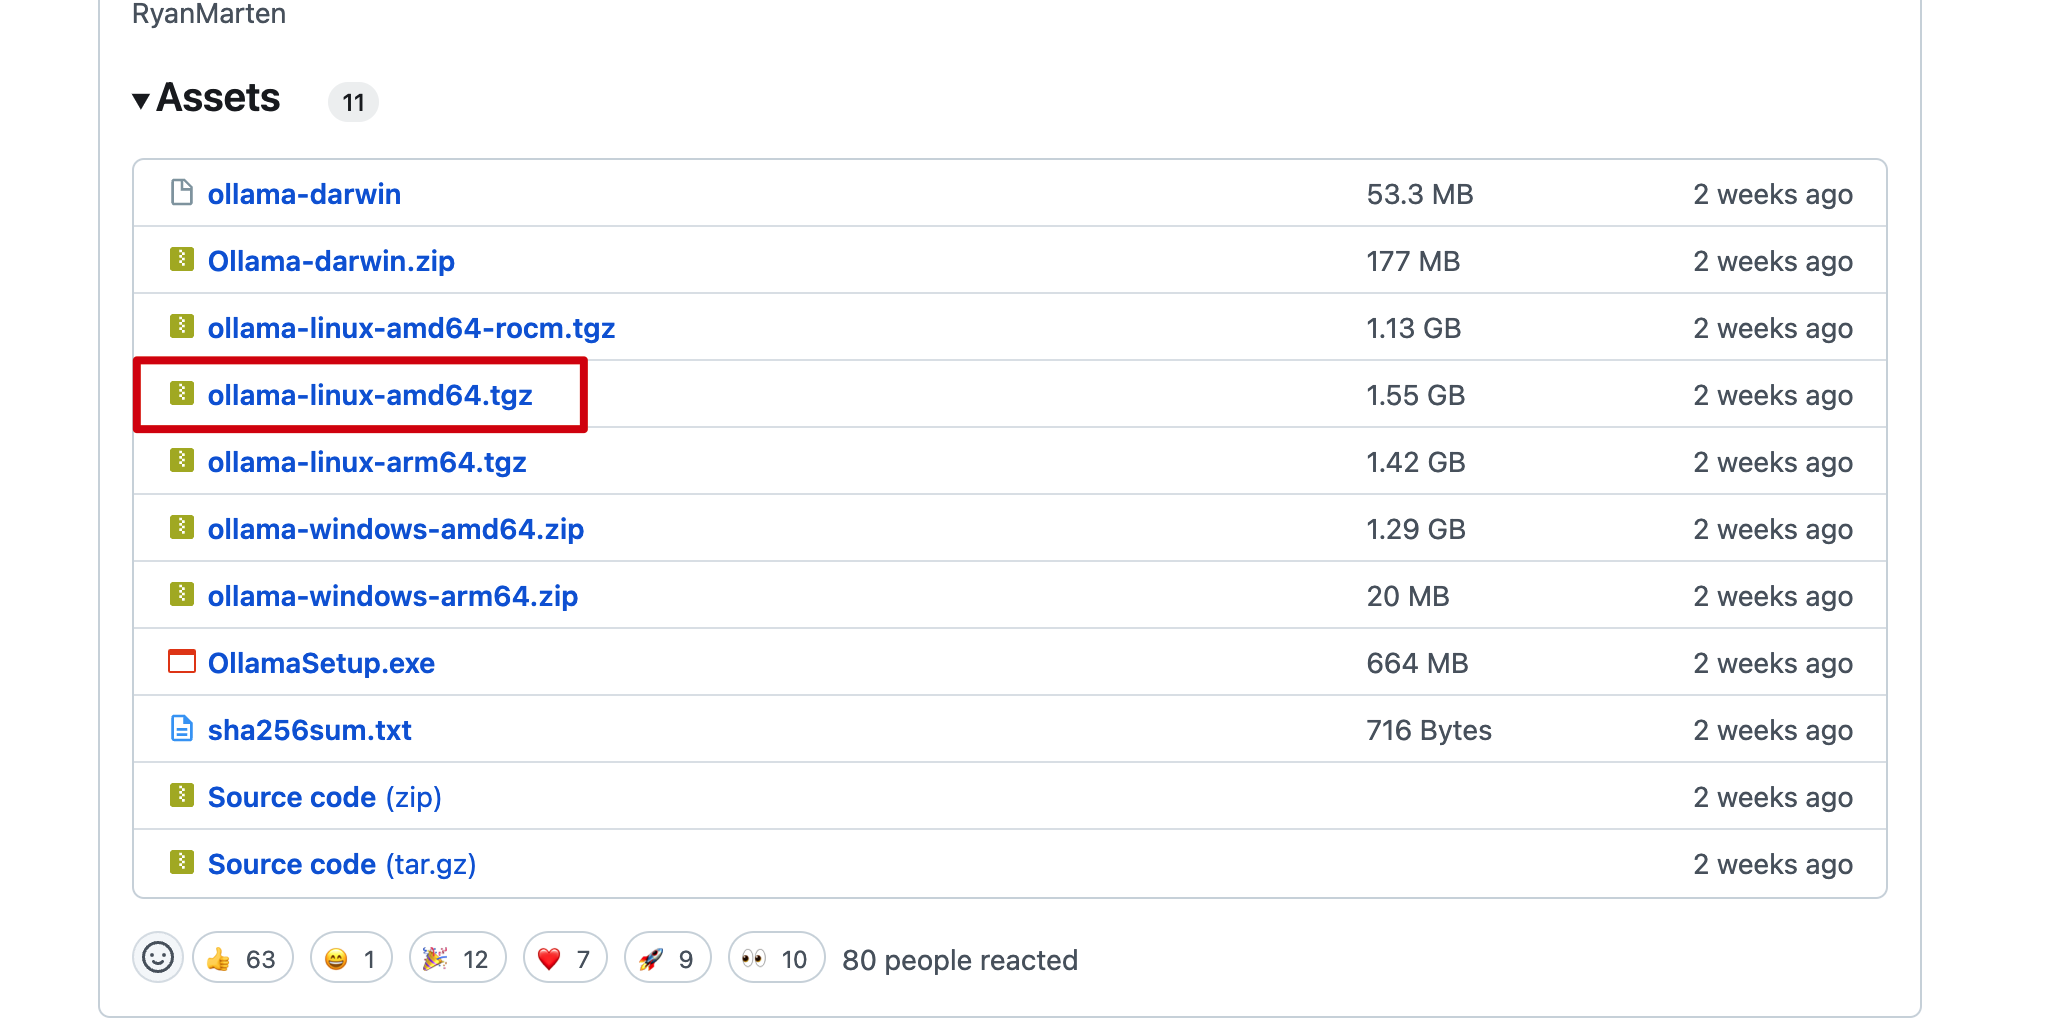
Download the appropriate installation package from the official Release page, based on the server’s CPU type. After downloading, upload the package to the server.
Installation
Extract the installation package ollama linux amd64.tgz, navigate to the extracted directory, and run the install.sh script to complete the installation.
# Extract the installation package
tar -zxvf Ollama\ Linux\ AMD64.tgz
# Move the ollama executable to the /usr/bin directory
sudo mv bin/ollama /usr/bin/ollama
Start and Enable Auto-Start
- Create an execution user. This step can be skipped; you can directly set
rootor any other user withollamaexecution permissions.
sudo useradd -r -s /bin/false -U -m -d /usr/share/ollama ollama
sudo usermod -a -G ollama $(whoami)
- Create a configuration file
Create the file /etc/systemd/system/ollama.service and populate it with the following content, filling in the User and Group fields based on your choice in the previous step.
[Unit]
Description=Ollama Service
After=network-online.target

[Service]
ExecStart=/usr/bin/ollama serve
User=ollama
Group=ollama
Restart=always
RestartSec=3
Environment="PATH=$PATH"

[Install]
WantedBy=default.target
Then execute the following commands
# Load the configuration
sudo systemctl daemon-reload
# Enable auto-start on boot
sudo systemctl enable ollama
# Start the ollama service
sudo systemctl start ollama
Offline Model Installation
Here, we will use the gguf model installation method. The installation methods for models are quite similar, and you can refer to the following steps.
Qwen2.5-3b
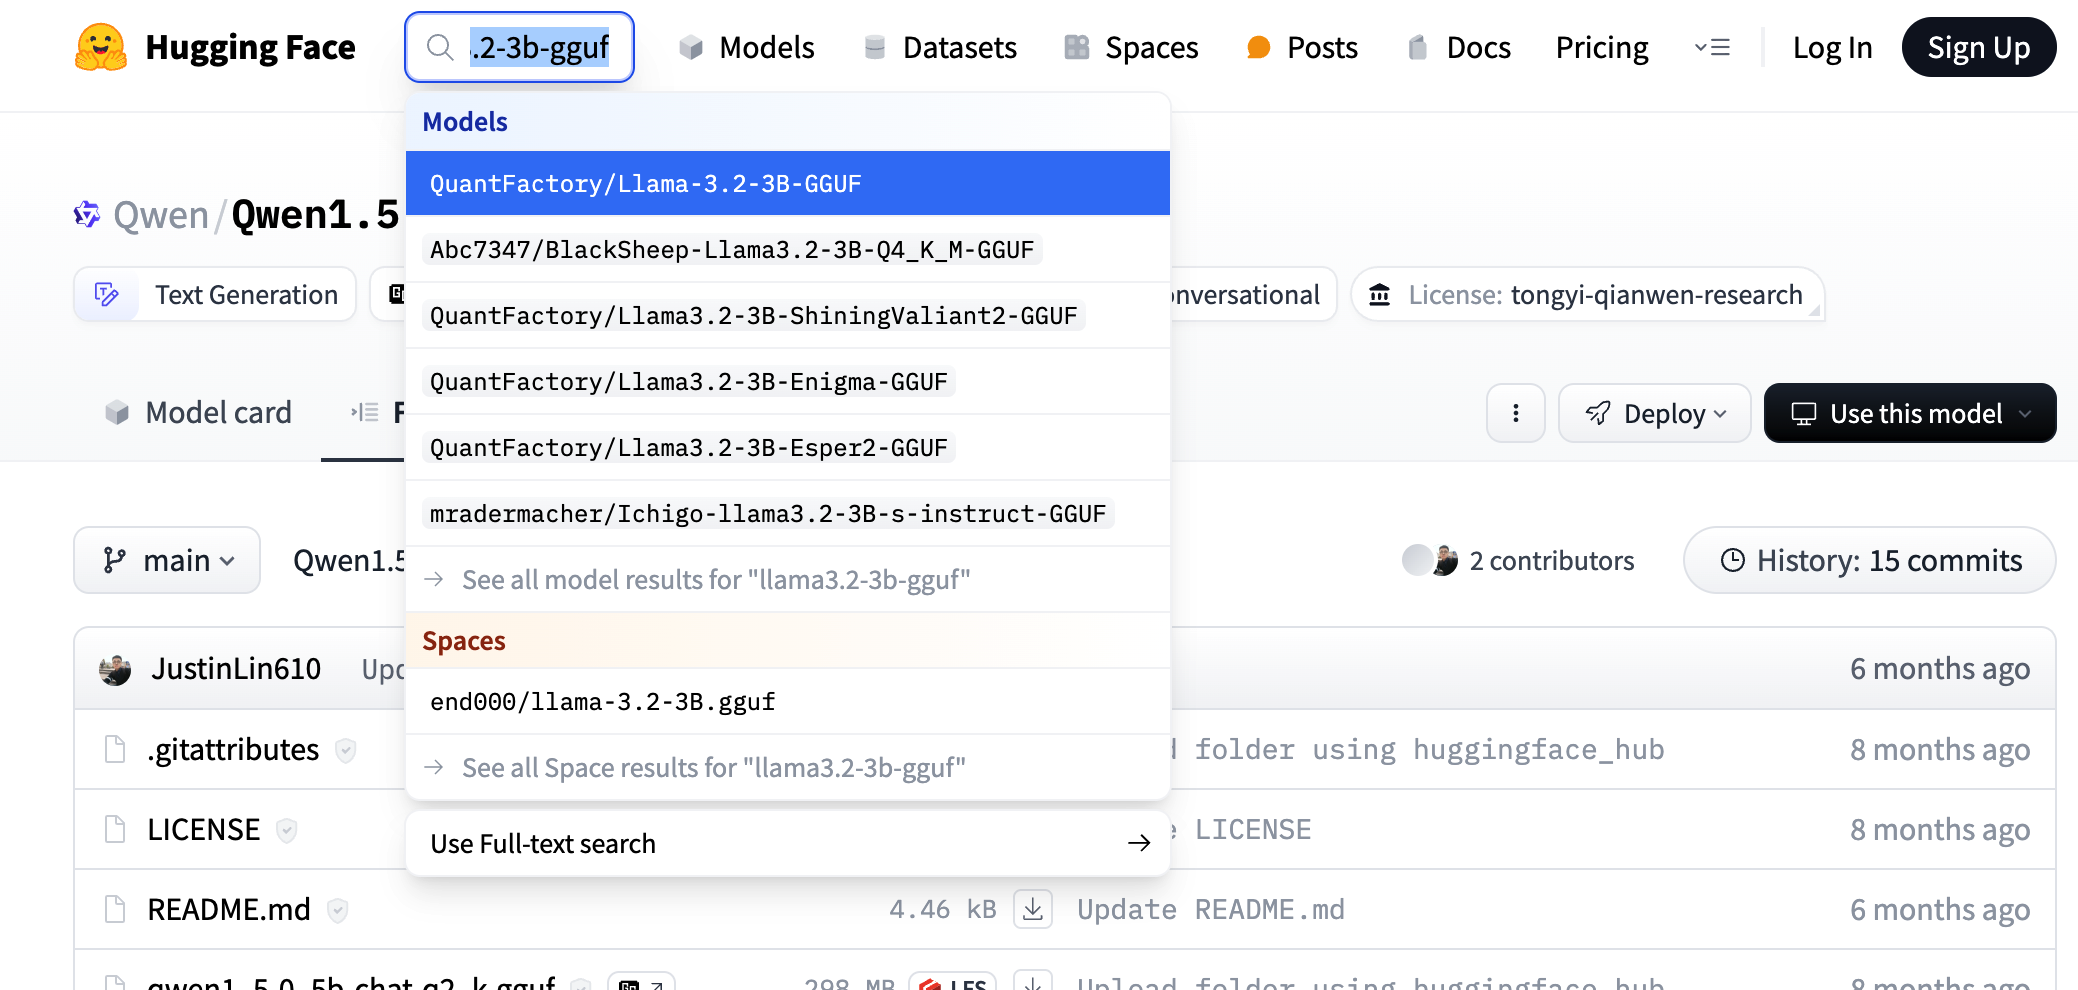
1.Download the model. You can search for the corresponding gguf version of the model on huggingface, such as searching for qwen2.5-3b-gguf.
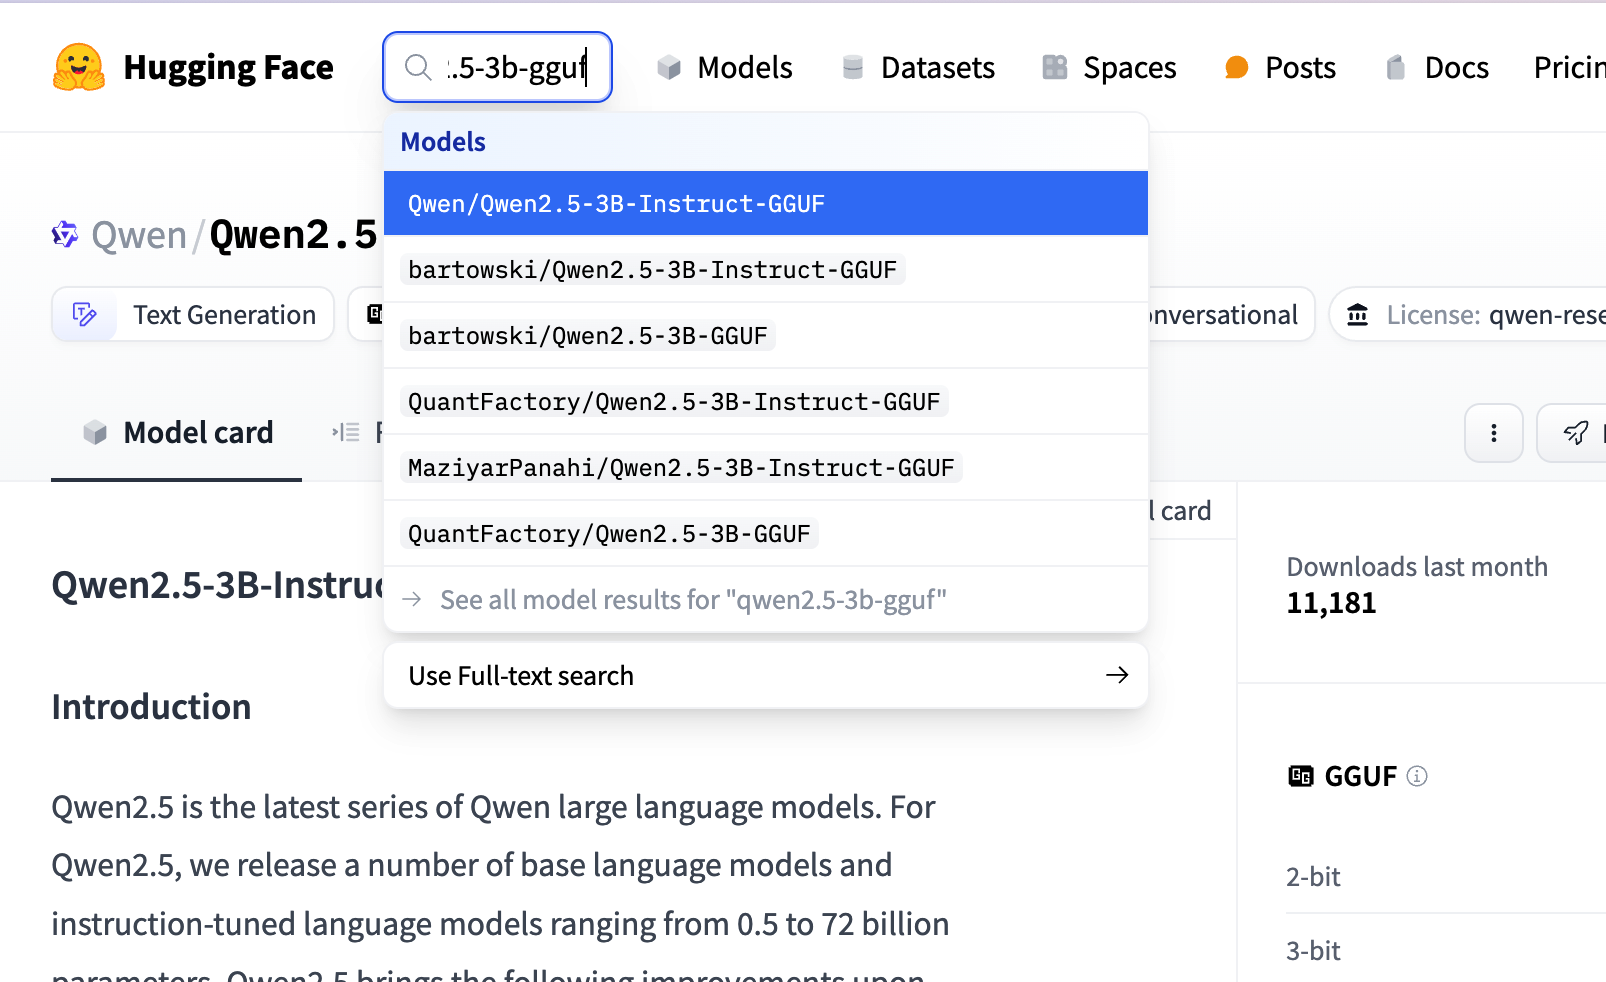
You can choose any fine-tuned version; here, we refer to the model version selected on ollama, as shown in the figure below.
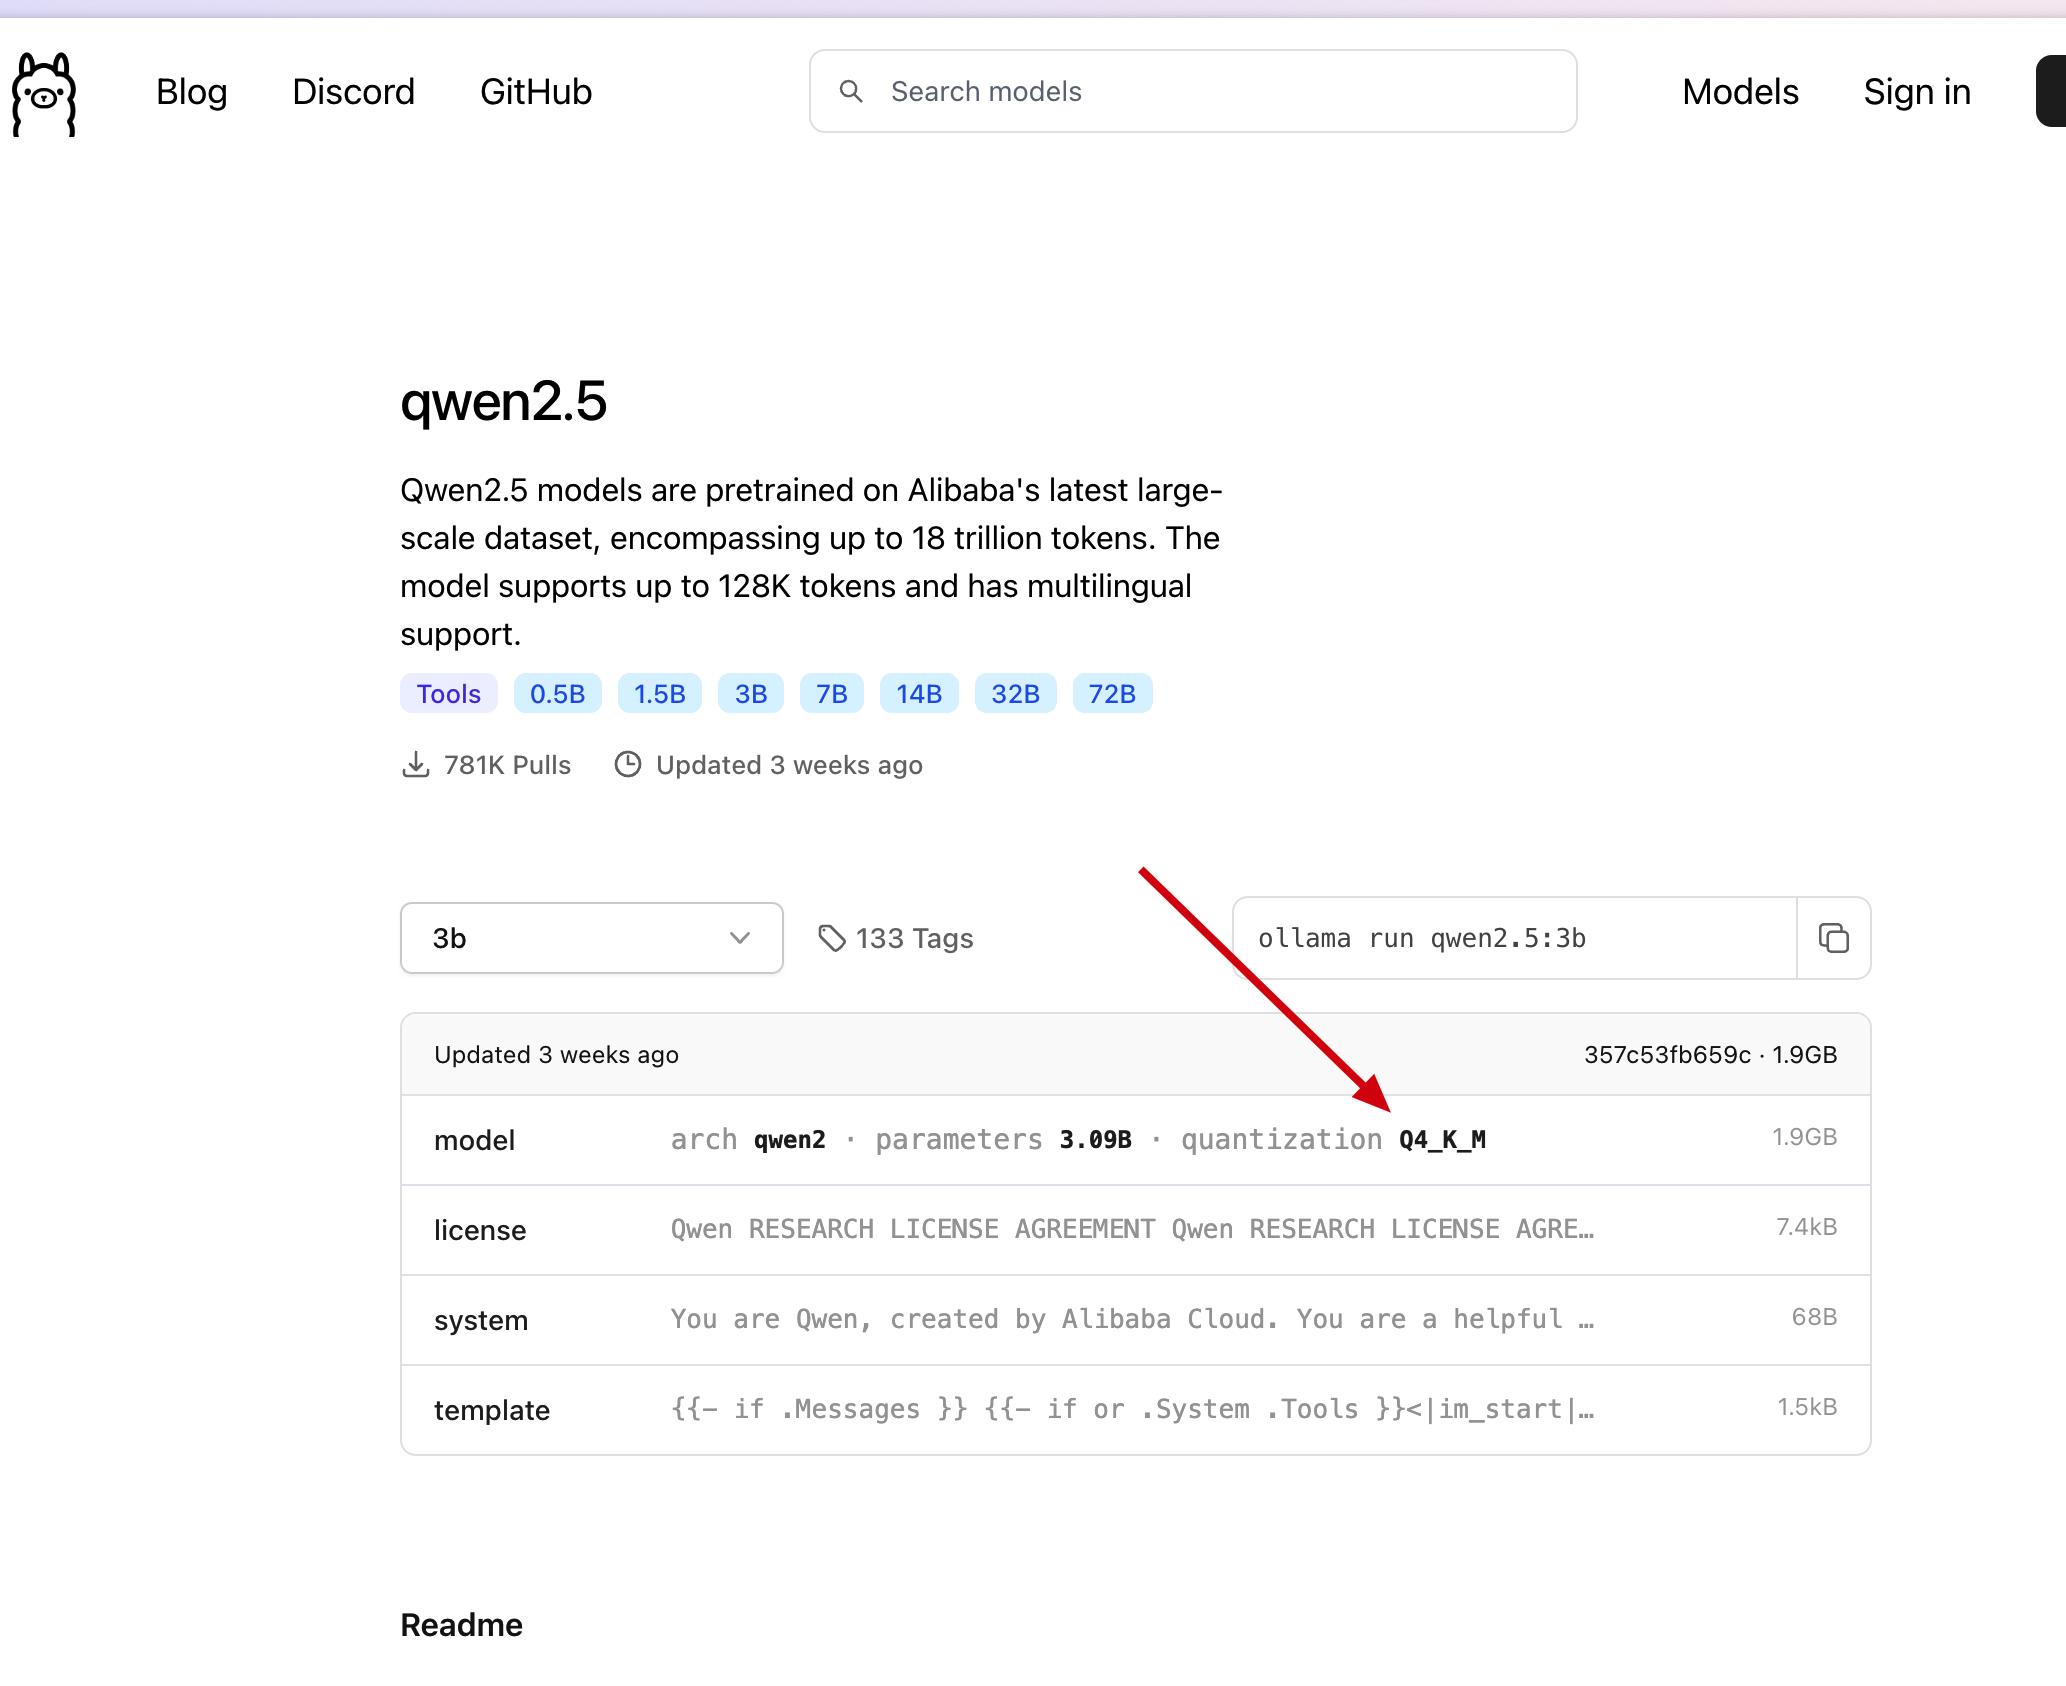
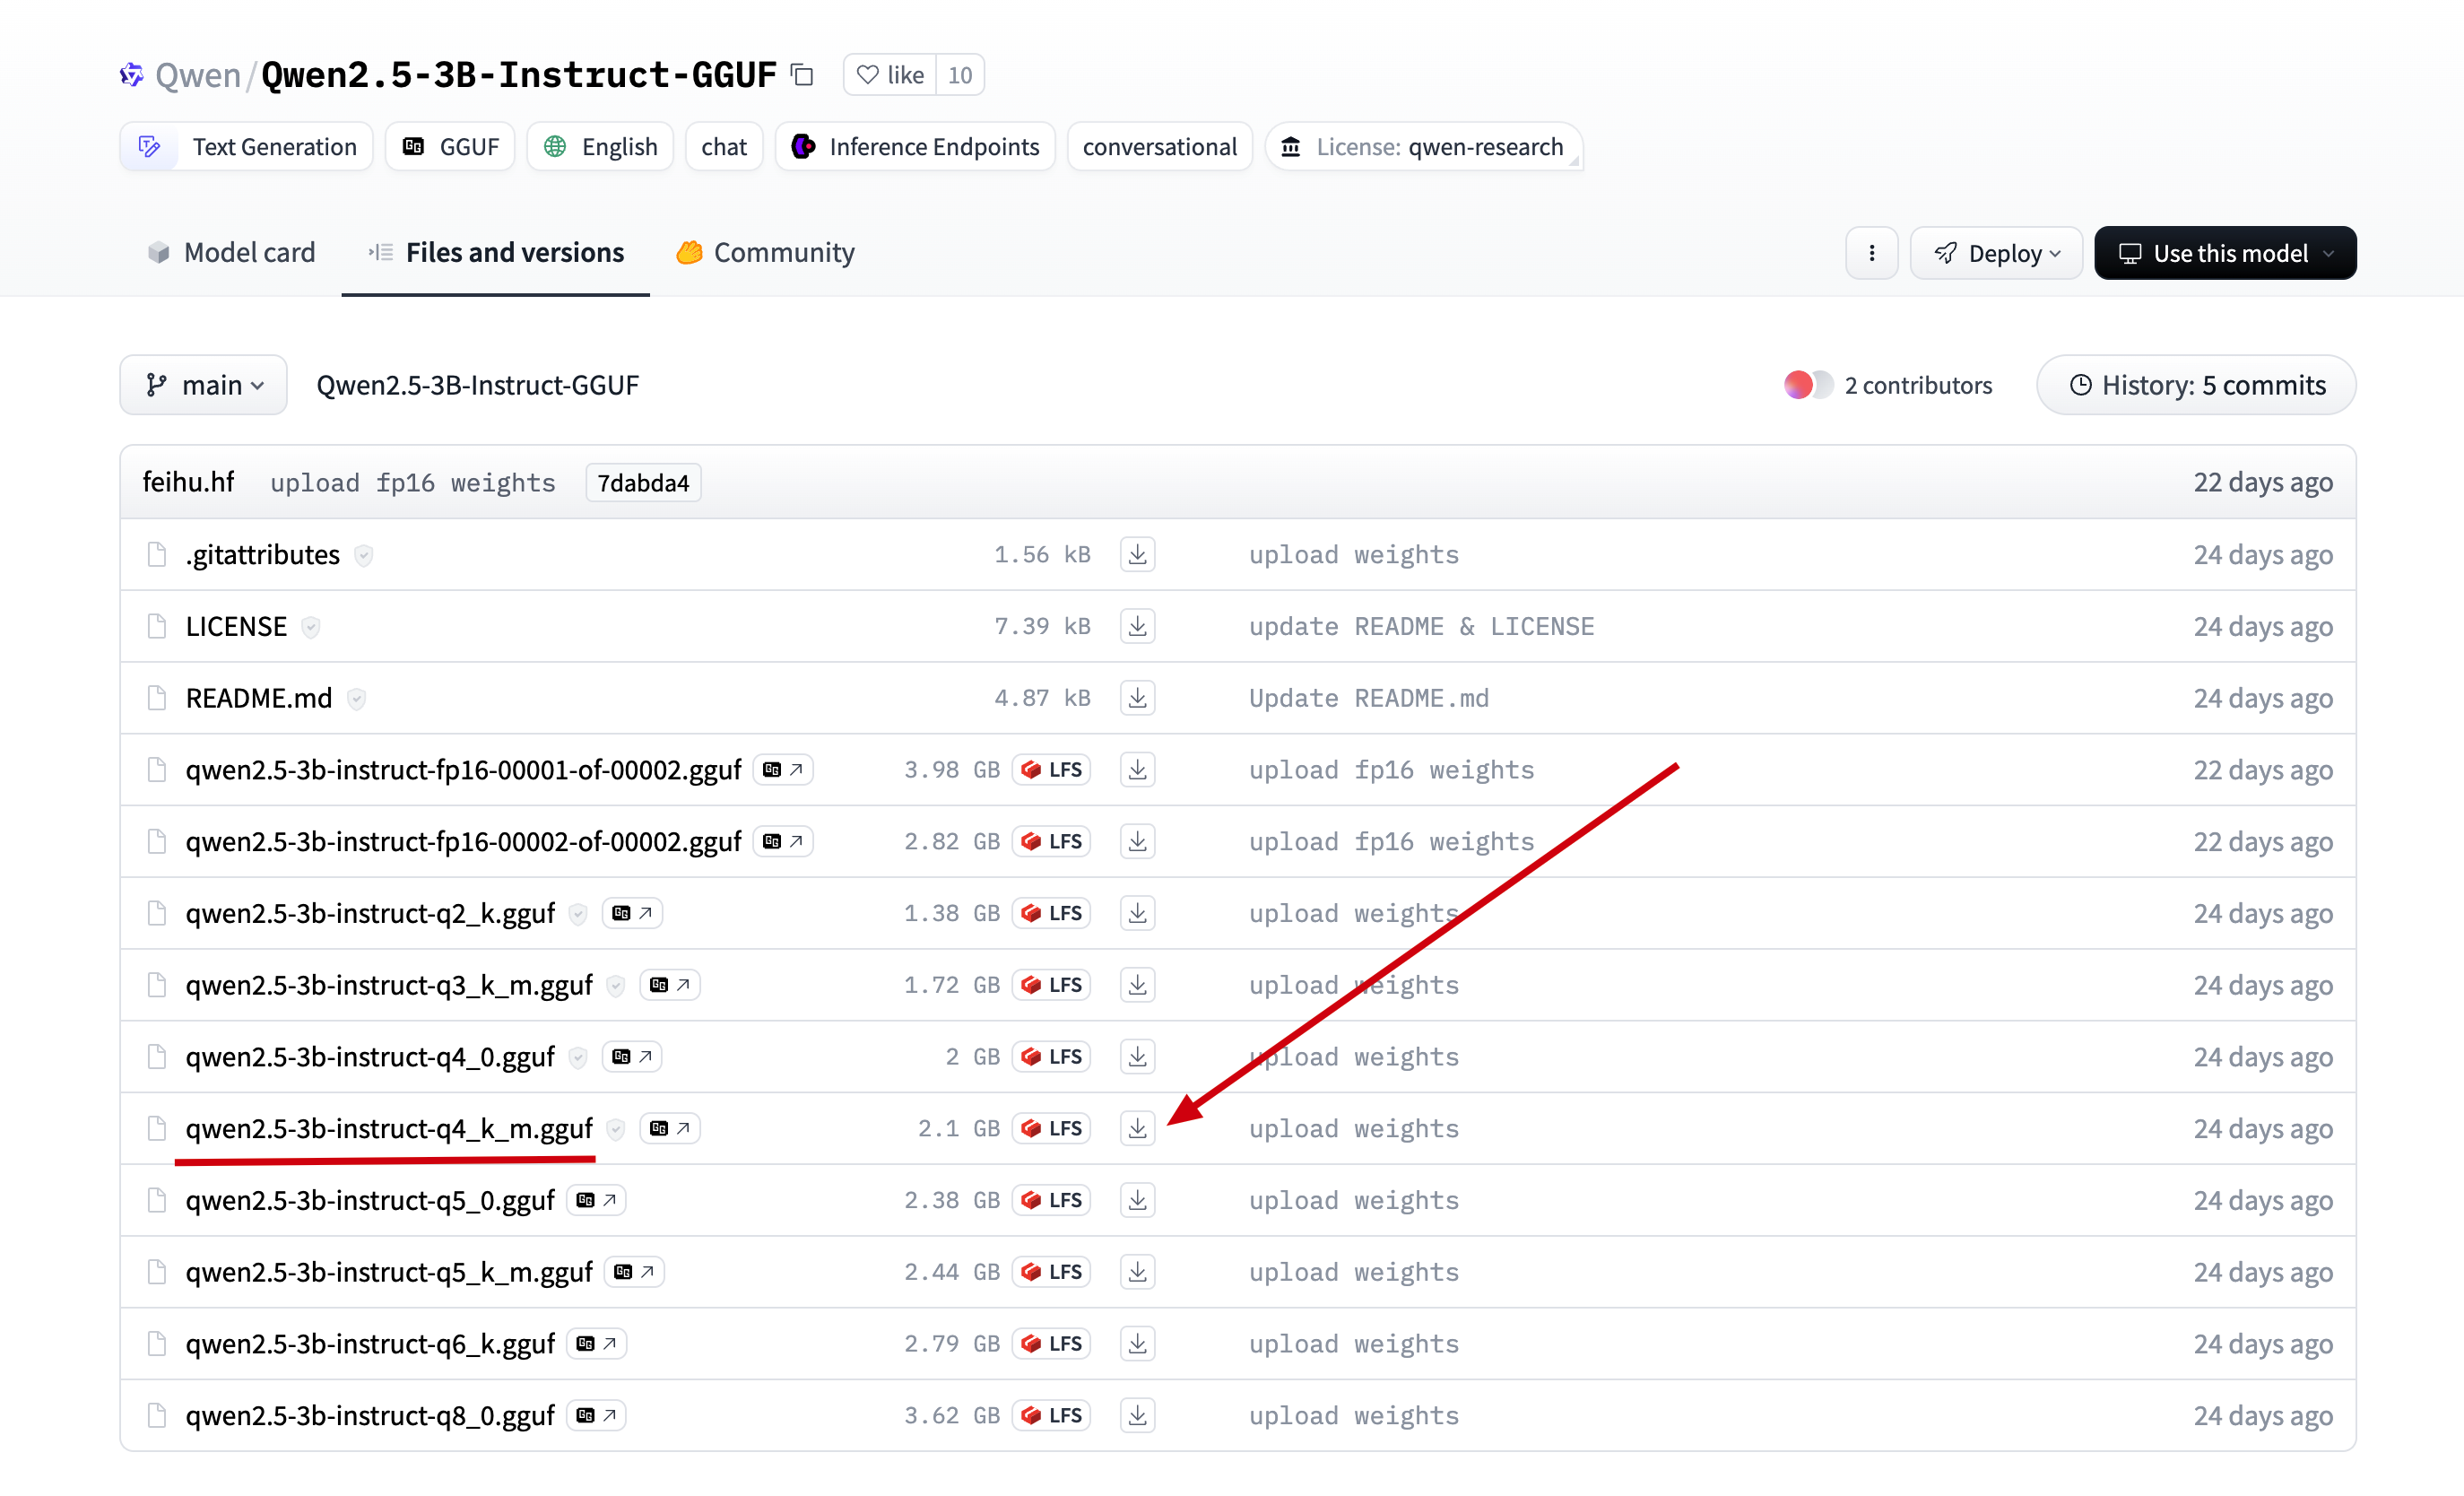
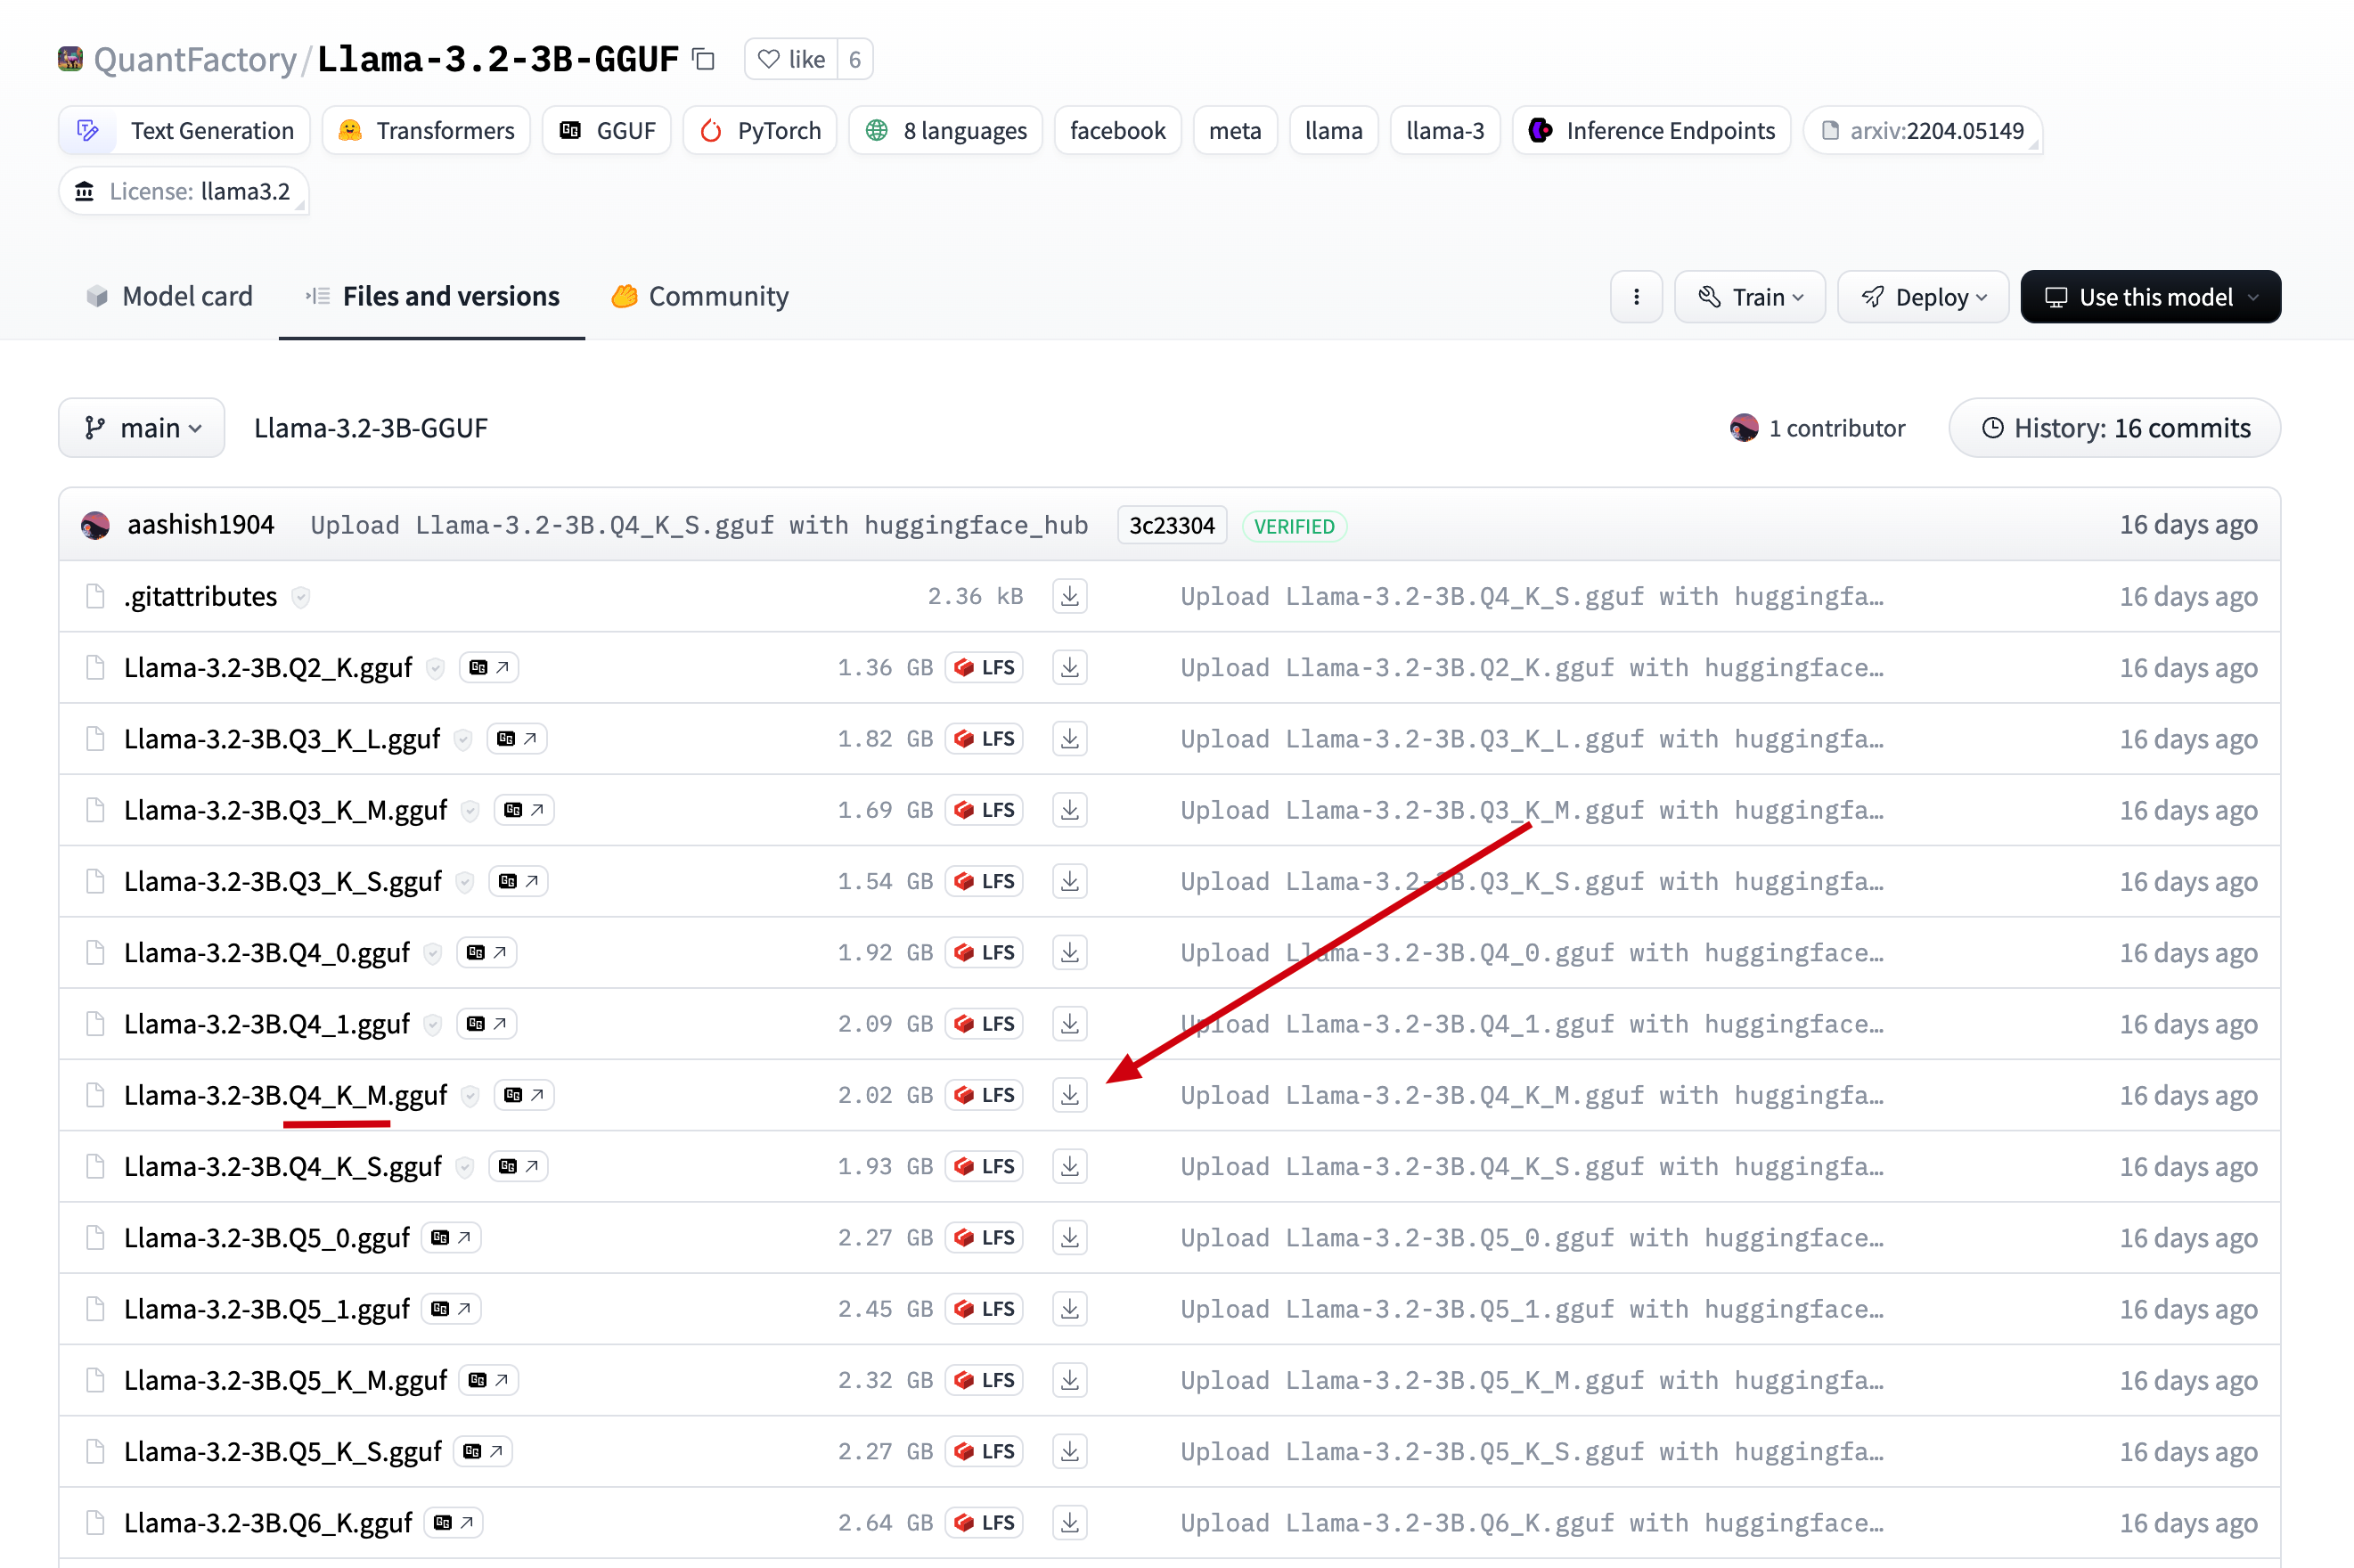
In the model we just found, click on Files and versions, locate the version found in ollama, and click download.
2.Upload the downloaded file to the server directory /data/ollama and rename it to qwen2.5-3b.gguf (renaming for easier reference later).
3.Create a file named Modelfile in the /data/ollama directory and add the following content.
# Model name from the previous step
FROM ./qwen2.5-3b.gguf

# You can find the template for the model on the ollama website, such as the template address for qwen2.5-3b: https://ollama.com/library/qwen2.5:3b/blobs/eb4402837c78
# Directly copy the Template from ollama into the three double quotes below
TEMPLATE """{{- if .Messages }}
{{- if or .System .Tools }}<|im_start|>system
{{- if .System }}
{{ .System }}
{{- end }}
{{- if .Tools }}

# Tools

You may call one or more functions to assist with the user query.

You are provided with function signatures within <tools></tools> XML tags:
<tools>
{{- range .Tools }}
{"type": "function", "function": {{ .Function }}}
{{- end }}
</tools>

For each function call, return a json object with function name and arguments within <tool_call></tool_call> XML tags:
<tool_call>
{"name": <function-name>, "arguments": <args-json-object>}
</tool_call>
{{- end }}<|im_end|>
{{ end }}
{{- range $i, $_ := .Messages }}
{{- $last := eq (len (slice $.Messages $i)) 1 -}}
{{- if eq .Role "user" }}<|im_start|>user
{{ .Content }}<|im_end|>
{{ else if eq .Role "assistant" }}<|im_start|>assistant
{{ if .Content }}{{ .Content }}
{{- else if .ToolCalls }}<tool_call>
{{ range .ToolCalls }}{"name": "{{ .Function.Name }}", "arguments": {{ .Function.Arguments }}}
{{ end }}</tool_call>
{{- end }}{{ if not $last }}<|im_end|>
{{ end }}
{{- else if eq .Role "tool" }}<|im_start|>user
<tool_response>
{{ .Content }}
</tool_response><|im_end|>
{{ end }}
{{- if and (ne .Role "assistant") $last }}<|im_start|>assistant
{{ end }}
{{- end }}
{{- else }}
{{- if .System }}<|im_start|>system
{{ .System }}<|im_end|>
{{ end }}{{ if .Prompt }}<|im_start|>user
{{ .Prompt }}<|im_end|>
{{ end }}<|im_start|>assistant
{{ end }}{{ .Response }}{{ if .Response }}<|im_end|>{{ end }}
"""

# This step refers to the parameters on ollama; however, there are no parameters for qwen2.5-3b on ollama. You can add them in the following format.
PARAMETER stop "<|im_start|>"
PARAMETER stop "<|im_end|>"
4.Execute the following commands to load and run the offline model.
# Create and run the qwen2.5 model using the model description file
ollama create qwen2.5 -f Modelfile
# Check the list of running models to see if it is active
ollama ls

# Use the API to call the model and check if it is running properly
curl --location --request POST 'http://127.0.0.1:11434/api/generate' \
--header 'Content-Type: application/json' \
--data '{
    "model": "qwen2.5",
    "stream": false,
    "prompt": "Hello, what is the first solar term of the 24 solar terms?"
}' \
-w "Time Total: %{time_total}s\n"
As shown in the figure below, a normal response indicates that the model has been successfully installed.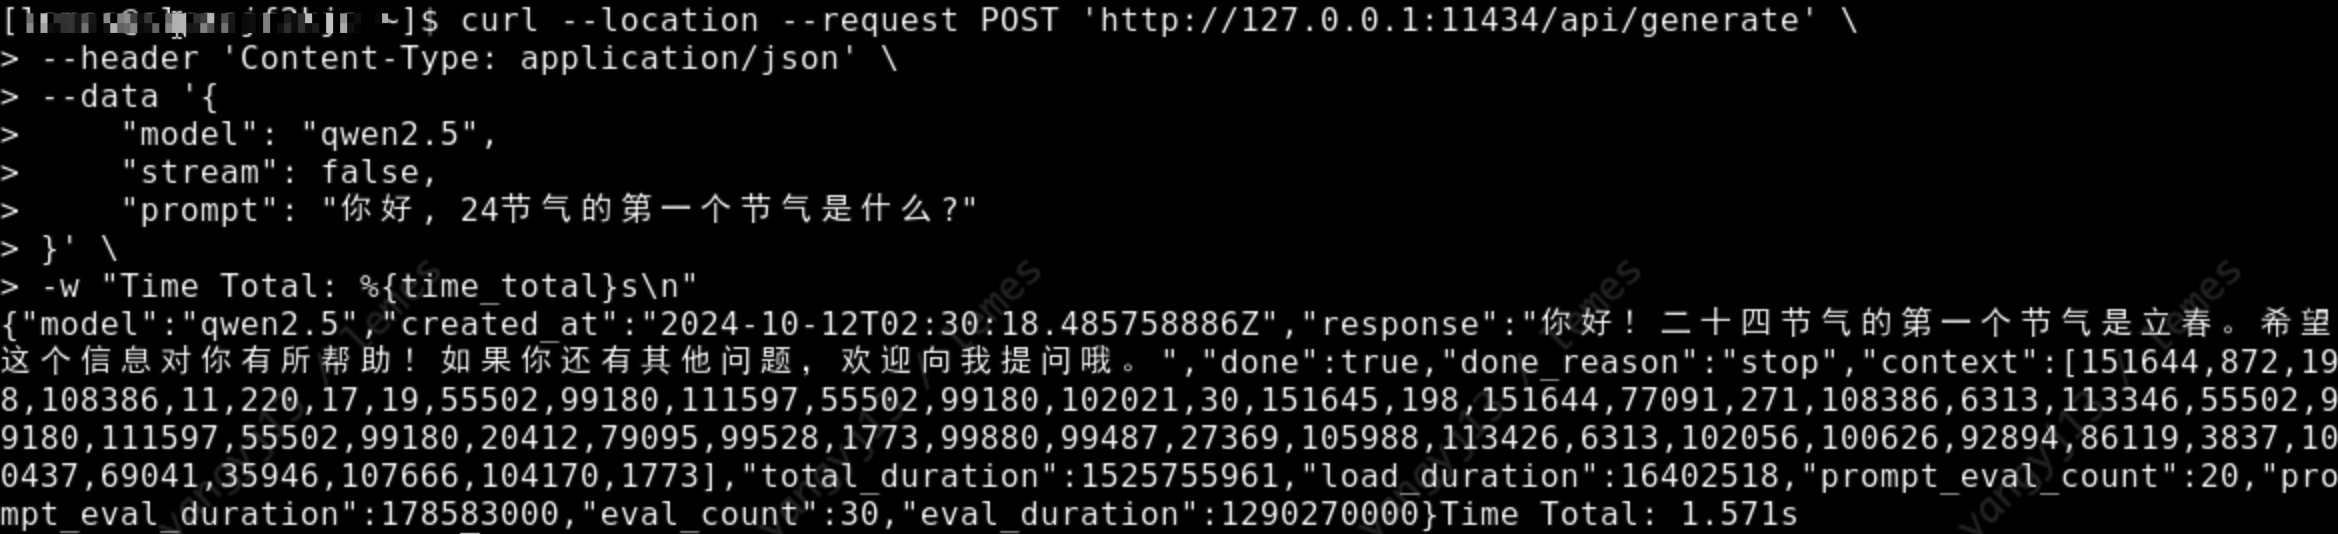
Llama3.2-3b
1.Download the model. You can search for the corresponding gguf version of the model on huggingface, such as searching for llama3.2-3b-gguf.
You can choose any fine-tuned version; here we refer to the model version selected on ollama, as shown in the figure below.
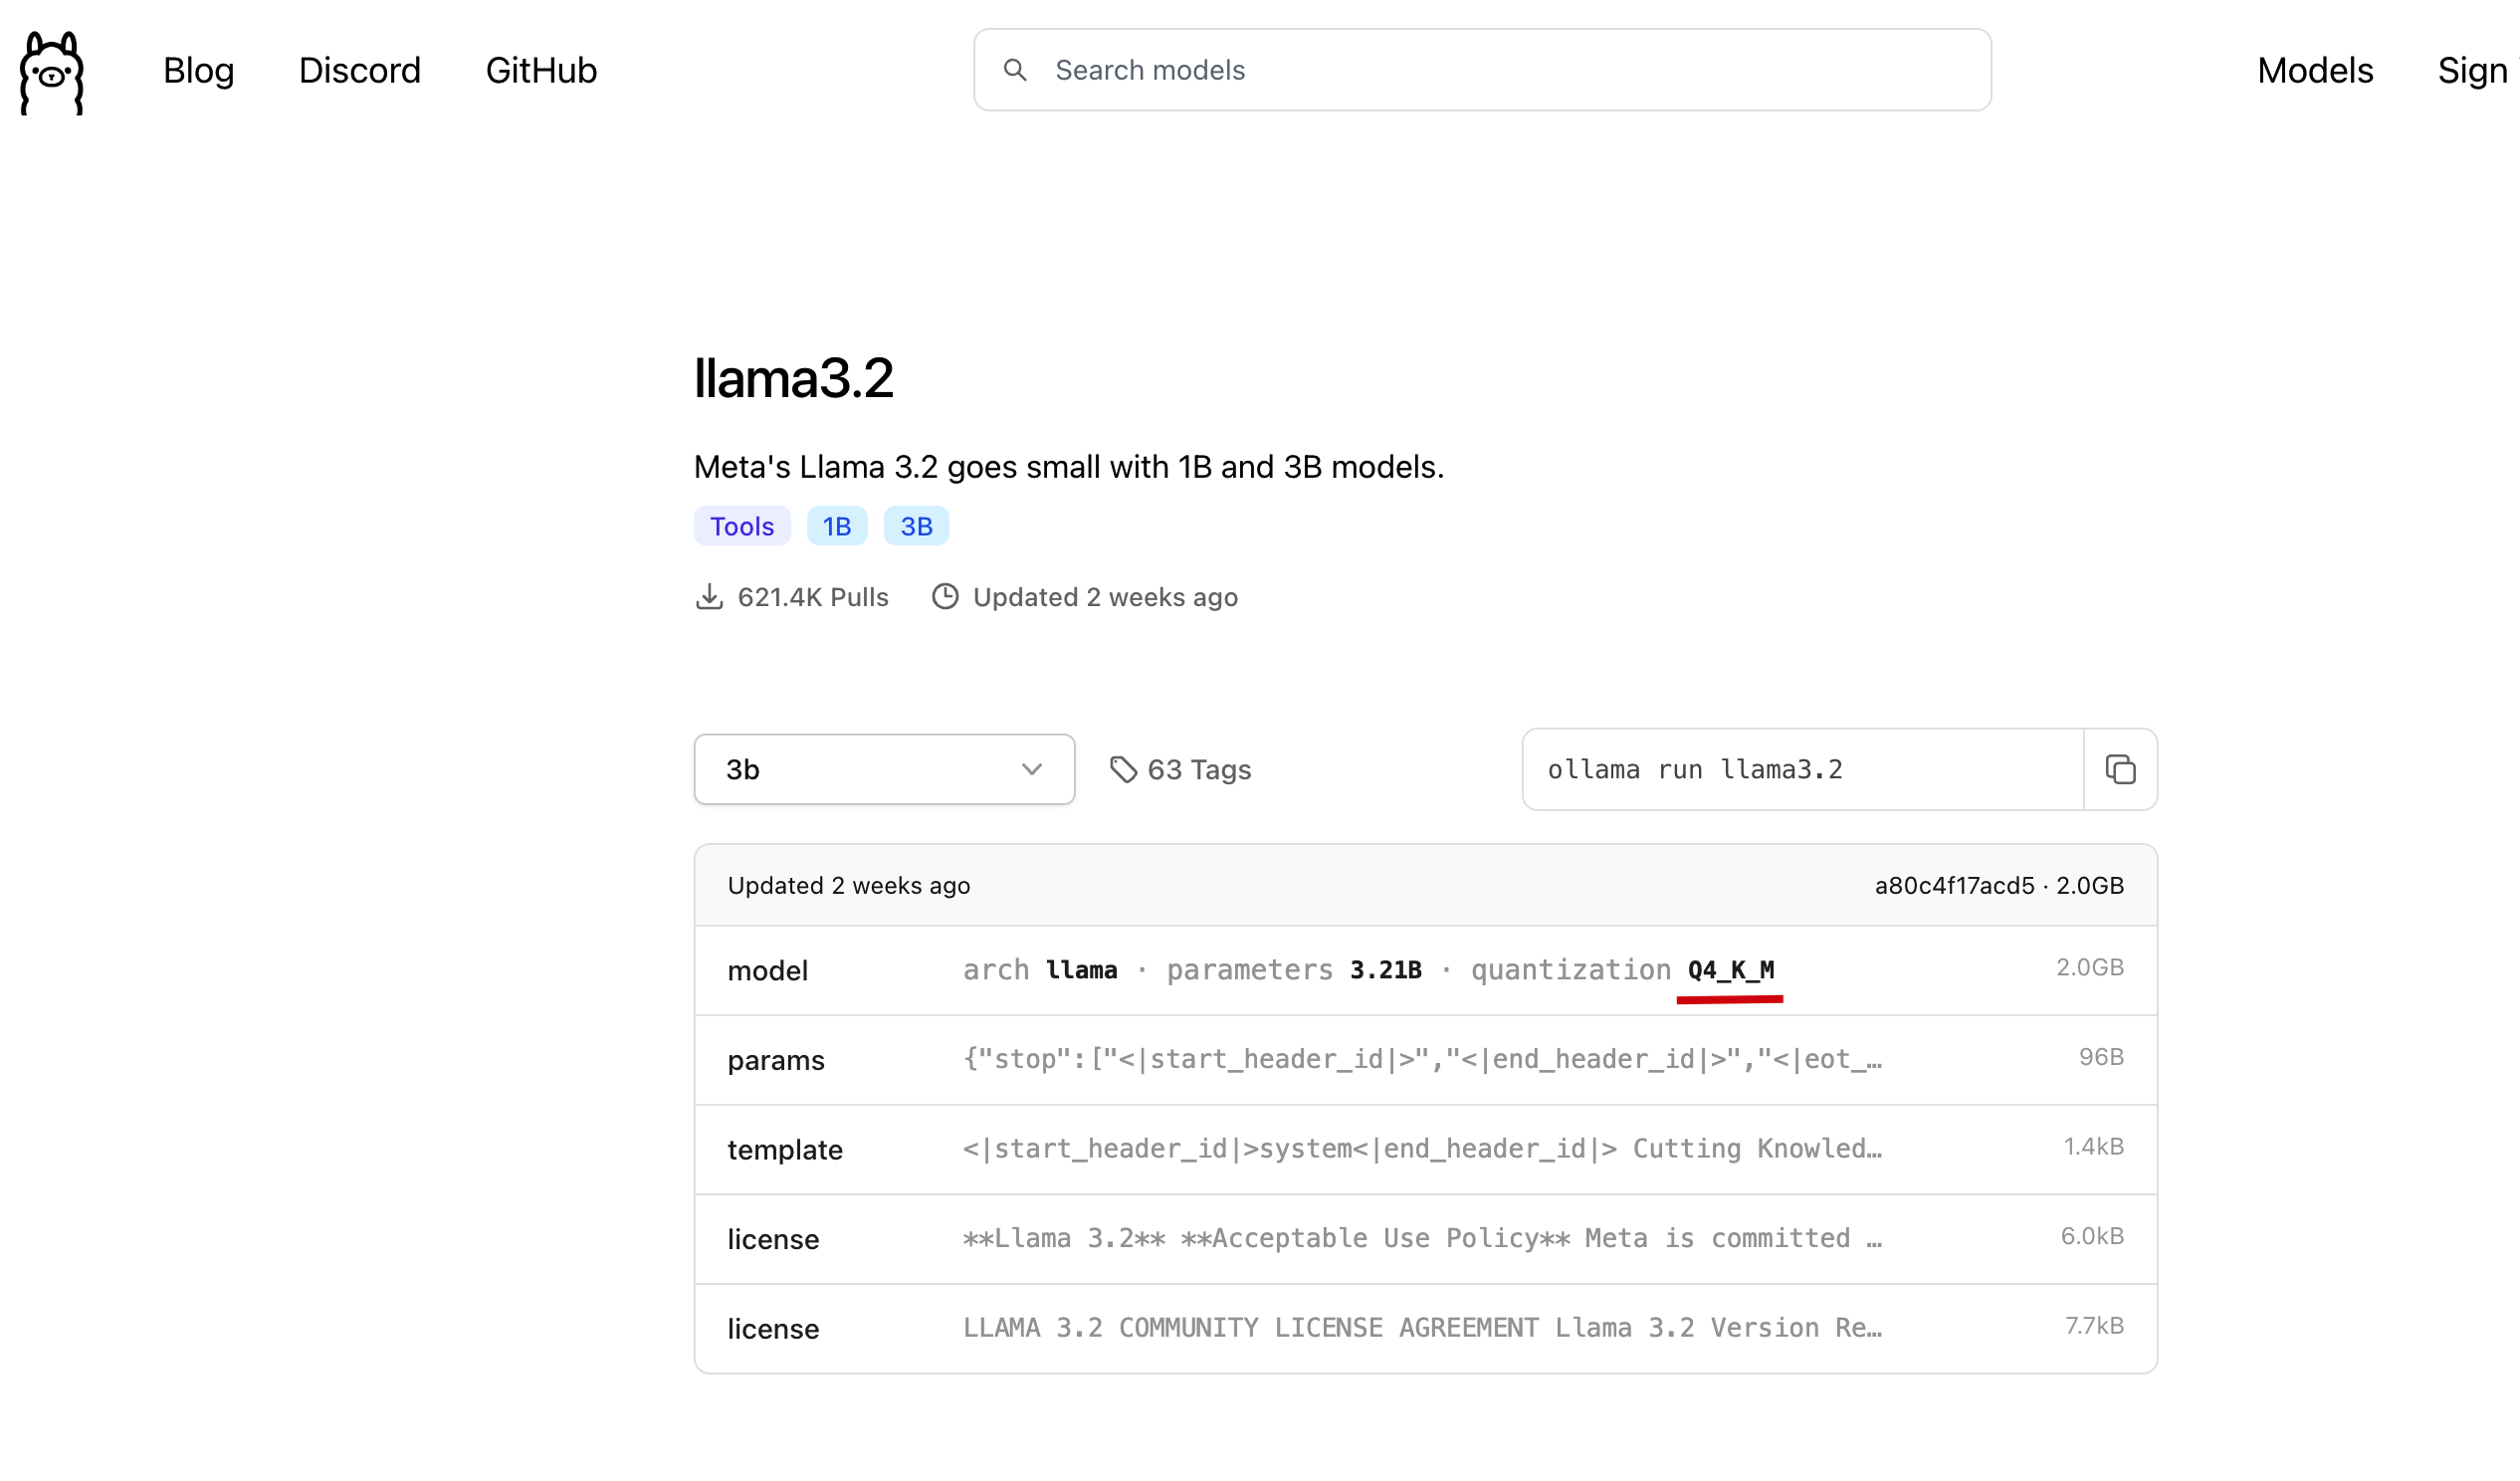
We directly click on Files and versions in the model we just found, find the version available on ollama, and click to download.
2.Upload the downloaded file to the server directory /data/ollama, and rename it to llama3.2-3b.gguf (renamed for easier reference later).
3.Create a file named Modelfile in the /data/ollama directory and add the following content.
# Model name from the previous step
FROM ./llama3.2-3b.gguf

# You can find templates in the model repository on the ollama website, for example, the template address for llama3.2-3b: https://ollama.com/library/llama3.2/blobs/966de95ca8a6
# Directly copy the Template from ollama into the three double quotes below
TEMPLATE """<|start_header_id|>system<|end_header_id|>

Cutting Knowledge Date: December 2023

{{ if .System }}{{ .System }}
{{- end }}
{{- if .Tools }}When you receive a tool call response, use the output to format an answer to the orginal user question.

You are a helpful assistant with tool calling capabilities.
{{- end }}<|eot_id|>
{{- range $i, $_ := .Messages }}
{{- $last := eq (len (slice $.Messages $i)) 1 }}
{{- if eq .Role "user" }}<|start_header_id|>user<|end_header_id|>
{{- if and $.Tools $last }}

Given the following functions, please respond with a JSON for a function call with its proper arguments that best answers the given prompt.

Respond in the format {"name": function name, "parameters": dictionary of argument name and its value}. Do not use variables.

{{ range $.Tools }}
{{- . }}
{{ end }}
{{ .Content }}<|eot_id|>
{{- else }}

{{ .Content }}<|eot_id|>
{{- end }}{{ if $last }}<|start_header_id|>assistant<|end_header_id|>

{{ end }}
{{- else if eq .Role "assistant" }}<|start_header_id|>assistant<|end_header_id|>
{{- if .ToolCalls }}
{{ range .ToolCalls }}
{"name": "{{ .Function.Name }}", "parameters": {{ .Function.Arguments }}}{{ end }}
{{- else }}

{{ .Content }}
{{- end }}{{ if not $last }}<|eot_id|>{{ end }}
{{- else if eq .Role "tool" }}<|start_header_id|>ipython<|end_header_id|>

{{ .Content }}<|eot_id|>{{ if $last }}<|start_header_id|>assistant<|end_header_id|>

{{ end }}
{{- end }}
{{- end }}
"""

# This step references the parameters from ollama. For llama3.2-3b, the params can be found at: https://ollama.com/library/llama3.2/blobs/56bb8bd477a5
PARAMETER stop "<|start_header_id|>"
PARAMETER stop "<|end_header_id|>"
PARAMETER stop "<|eot_id|>"
4.Execute the following commands to load and run the offline model.
# Create and run the llama3.2 model using the model description file
ollama create llama3.2 -f Modelfile

# Check the list of running models to see if it is active
ollama ls

# Call the model through the API to check if it is functioning properly
curl --location --request POST 'http://127.0.0.1:11434/api/generate' \
--header 'Content-Type: application/json' \
--data '{
    "model": "llama3.2",
    "stream": false,
    "prompt": "Hello, what is the first solar term of the 24 solar terms?"
}' \
-w "Time Total: %{time_total}s"
As shown in the image below, the model returns the response correctly, indicating that it has been successfully installed.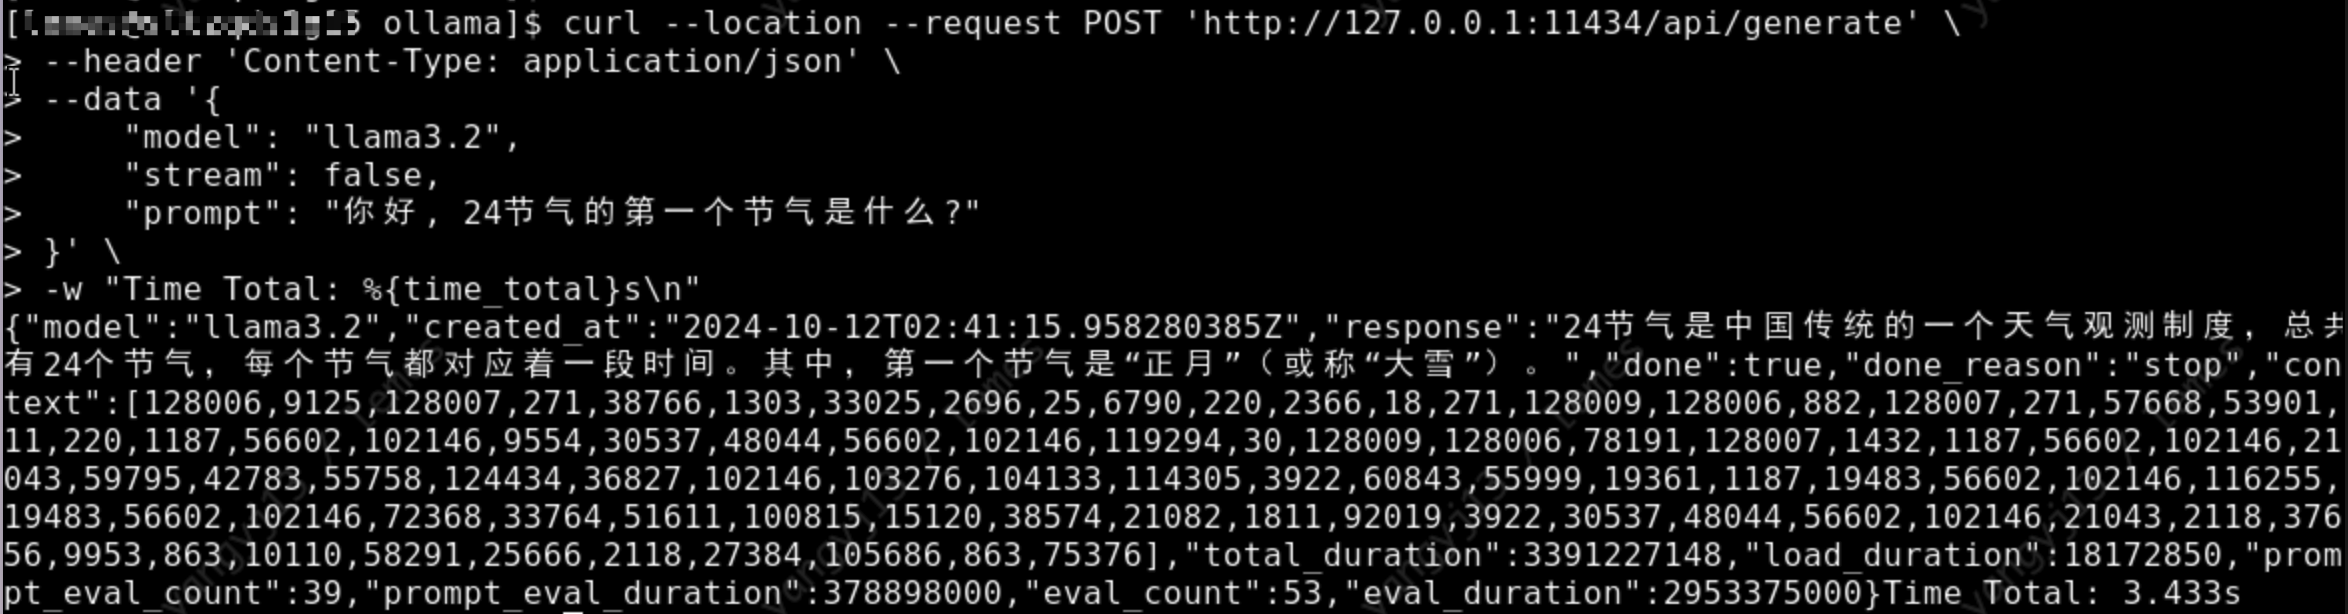
Conclusion
Ollama is a very useful tool for installing models. I hope everyone enjoys using it! If you encounter any installation issues or have tips to share, feel free to discuss them in the comments~~~
转载请注明来源,欢迎对文章中的引用来源进行考证,欢迎指出任何有错误或不够清晰的表达。可以在下面评论区评论,也可以邮件至 [email protected]

